...Menu...
Menu Group: Transaction Processing: Post Time: Post Other Time Worked
The Post Time Worked program is used to enter employee time sheets/cards for the period of pay. The program will be used for employees other than salaried or with Templates. You may choose an employee from the browser or enter his/her number in the appropriate box. The highlighted (blue) boxes represent those fields that have a lookup table. Double click on the box to browse its table.
The minimum information needed to post a transaction (once an employee is chosen) are the number of hours worked. Clicking on the STORE button or hitting the F2 key will post the transaction. For more information on some of the fields see below.
This program uses parameters to control many aspects of the program flow. Please see the description of these parameters in the Payroll Settings record.
To speed up processing you can use these keys on the numeric keypad as shortcuts:
Key Functions as:
+ tab
enter save
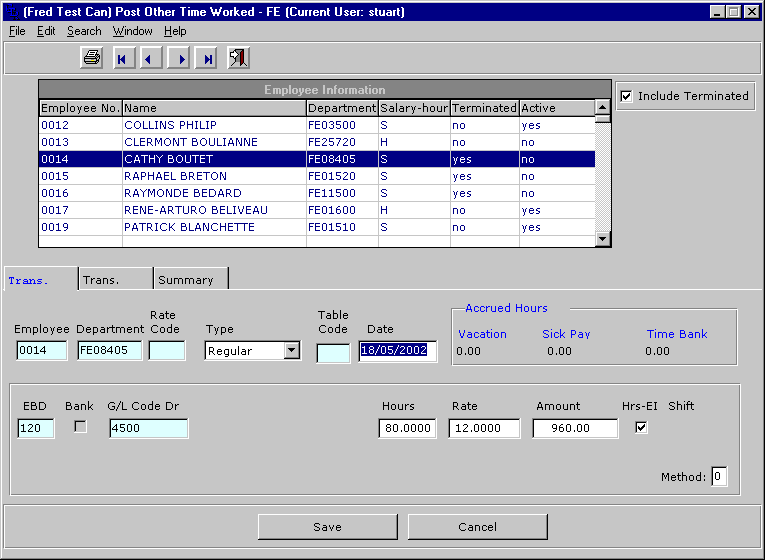
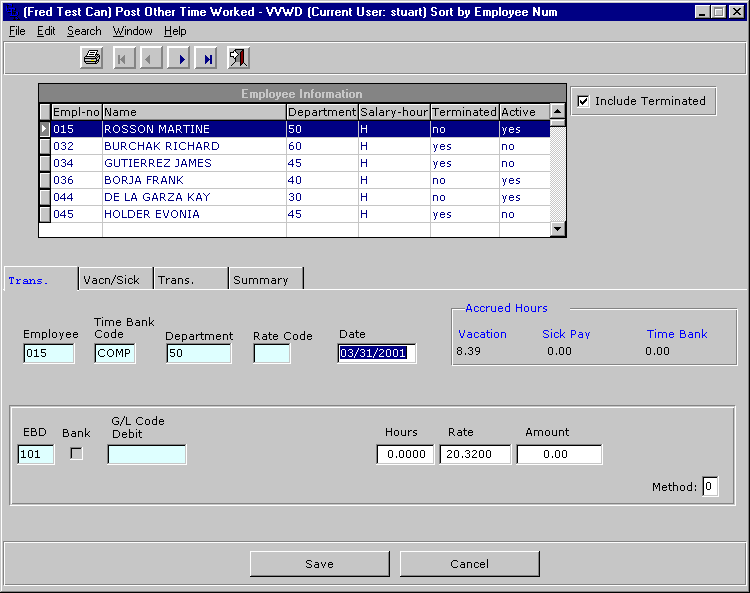
This frame is divided into three distinct areas or sections. The first is the Employee identifier section, the second is the standard time posting section, and the third is used for special situations.
Employee Identification Section
In this section you will enter the employee number. The department will default from the employee master and may be changed to reflect the department that the employee actually worked for. If a Time Bank Code is defaulted from the Employee Profile then the bank check boxes will not be shaded. You may enter another bank code for this transaction if the time is to be banked to another time bank for the employee (i.e. the employee has multiple time banks). The only other piece of information needed in this section is the date of the transaction. If you are posting daily then each transaction will carry the date of the occurrence, if you are only posting a summary of the time worked for the entire period then the date can be the ending date of the period. You may also post transactions to a date outside the range of the current pay period, that is, future dated transactions. The proper pay period will be calculated automatically upon entering the transaction date.
Post Hourly Time Section
This is where you will post standard time entries. The hours entered in these boxes will default to EBD's as illustrated in the table:
| Box | EBD Default |
| Regular | 101 |
| Overtime | 102 |
| Double-time | 103 |
| Adjustment | 124 |
The bank switch box will be enabled for those EBD's specified as bankable in the General EBD Switch definition. This means that you have complete control over which EBD's can be banked. We have defined the switch for you, all you have to do is make an entry in the General Switch file to enable an EBD.
If you are finished posting you may click on the STORE button or hit the go key. The information in the next section is optional, i.e. you use it when you need to.
Post Other EBD's Section
The data posted in this section will be ad-hoc, you may post transactions to any EBD, override the G/L code, post to a specific job etc. In some instances the transactions posted in this section will be standalone (i.e. you haven't posted anything to any other section), or multiple transactions may be generated based on your other postings. Many different types of transactions may be posted here based on the EBD you use. The best way to learn about all the different possibilities is to experiment by posting different types of transactions and using the EDIT button to see what is generated. You may also change the tax method for the transaction. You can change the method only if you are creating the entry as a separate cheque/check. For example, say you have to post 10 time transactions and a bonus. You would like the bonus to be taxed under a different method. Set the tax method for the bonus using this field, but ensure that the bonus transaction is posted to a separate cheque/check by changing unchecking the additive switch in transaction maintenance. Also, if you are posting 10 time transactions and would like to tax them all under a different tax method then ensure that you enter the tax method on the first transaction. Doing this will cause all the transactions to carry the method of the first.
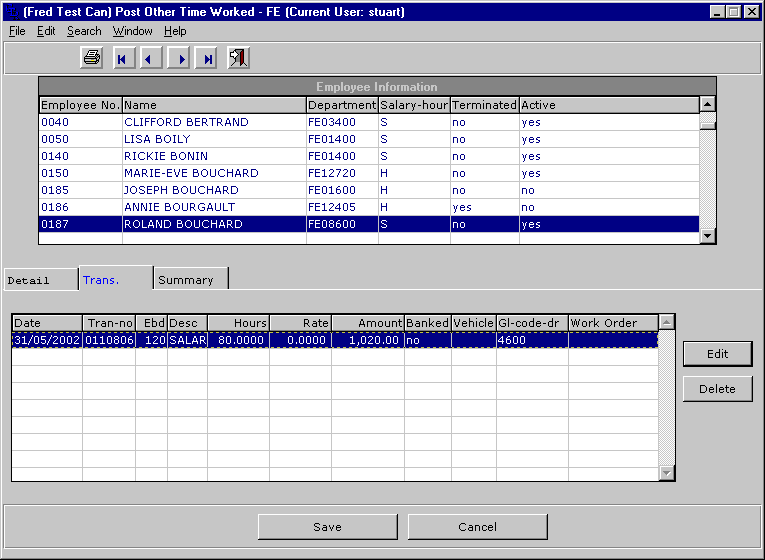
This screen allows you to view all the transactions associated with the chosen employee. To edit a transaction, highlight it and click the EDIT button.
You may post Vacation, Sick pay, Time Bank, or Family Leave transactions using this folder.
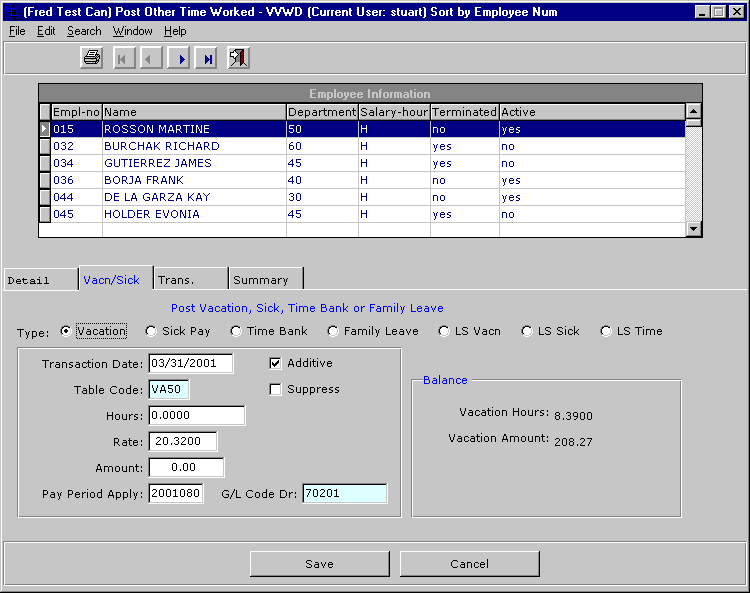
| Field | Description |
| Type | Choose the transaction type (LS = Lump Sum) |
| Transaction Date | Enter the date |
| Table-code | The table will be defaulted from the employee master and represent their default bank. |
| Hours | Enter the hours. |
| Rate | The rate will default to the employee rate and may be changed. |
| Amount | The amount will be calculated as hours X rate and can be changed. |
| Pay Period to Apply | Enter the pay period to apply this transaction. If the employee is taking vacation in the next period you will enter the period number here. |
| Additive | Click if you want the amount of this transaction to be added to the employees regular check. |
| Suppress | Click here if you want the employees' regular check to be suppressed for the Pay Period you entered in the Pay Period field above. |
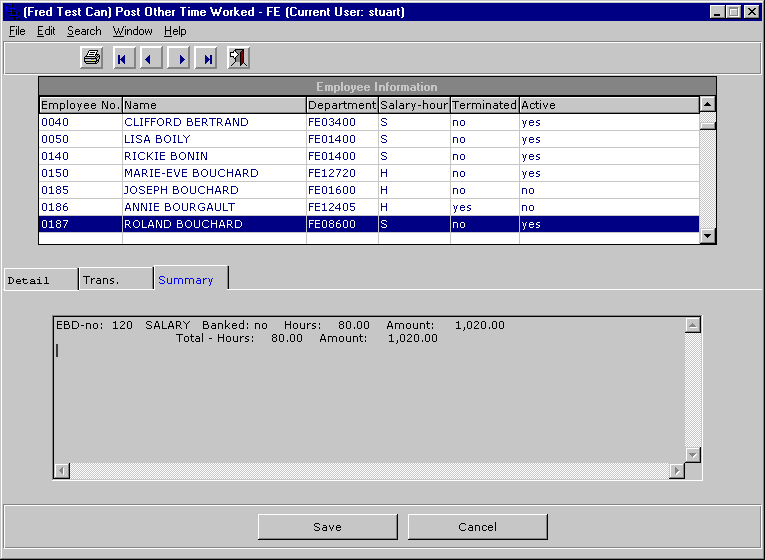
The summary tab will display a summary of all the transactions posted for the selected employee.
Last updated October 20, 2006